Old-Fashioned Pineapple Upside Down Cake
Old-fashioned Pineapple Upside Down Cake
Need an easy cake recipe? Warm and buttery, sweet pineapple makes this amazing cake a simple dessert sure to please! Great way to sneak in a little fruit… Garnish with ice cream or whipped cream for the perfect end to your meal!
Old-fashioned Pineapple Upside Down Cake
Yield: 6- 8 slices per cake
Ingredients:
1 large egg
¼ cup vegetable oil
¾ cup granulated sugar
¼ cup pineapple juice, reserved from canned pineapple
½ cup low fat milk
2 teaspoons vanilla extract
2 teaspoons baking powder
¼ teaspoon salt
1 1/3 cups all purpose flour
or 1 box yellow or butter cake mix for 2 8-inch cakes
¼ cup butter
½ cup brown sugar, packed
6 pineapple rings (canned in juice), drained
6 Maraschino cherries
10 pecan halves or 1/4 cup chopped pecans, optional (but yummy)
Garnish: Whipping cream or vanilla ice cream
Equipment needed:
Hand mixer or stand up mixer
Liquid and dry measuring cups
Measuring spoons
Rubber spatula
Small mixing bowl
Wire whisk
One or two 8 -inch round cake pans
10-inch dinner plate
Small knife
Potholders
Toothpick or cake tester
I love this warm, gooey cake with melted brown sugar. Melts in your mouth! This yummy dessert is super easy too… my Foods 1 students made it in their second cooking unit! One boxed cake mix, brown sugar, butter, pineapple, maraschino cherries and pecan halves and you’re good to go! The only tricky part is the “upside down flipping” process, but I’ll walk you through that and the results will be fabulous! My hubby was drooling when I baked the one for the post pics… he even ate most of one… good thing I made two! Assemble your ingredients and the preparation start baking!
Preheat oven to 350 F.
Ready your stand up mixer or large mixing bowl and hand mixer for your liquid ingredients. I always add the liquids first as they line the bottom of the mixing bowl and reduce dry ingredients from sticking to the bottom. Less scraping and clumping too! If making a scratch cake, first blend egg, oil and sugar together well until creamy yellow. Add milk and continue mixing, then add vanilla. Blended liquids will be a creamy ivory color.
If you’ve never had pineapple upside down cake you’re in for a treat! The pineapple is a different ingredient than in most cakes and provides a sweet, tangy replacement for the frosting layer…not to mention that it’s nutritious too! Open can of pineapple canned in juice and remove 6 slices. Place them to the side in a small bowl and pour ¼ cup pineapple juice into a liquid measuring cup. The rest of the can is free to eat or to make another cake if the first one disappears quickly! Add juice to other liquids in mixing bowl and blend.
Next we are going to combine the dry ingredients, so grab a small mixing bowl and pour in the all-purpose flour. Add the baking powder and salt and mix together using a wire whisk. Blend together until the baking powder is no longer visible. Blending dry ingredients will help distribute them more efficiently in the cake batter. Cakes are considered a quick bread due to the use of a chemical leavening agent, baking powder. Over mixing a quick bread batter will create a final product full of tunnels and holes… not meal appeal!
Add blended dry ingredients to liquids and mix on low until ingredients are blended, but still lumpy. Scrape down sides of bowl with rubber spatula to ensure all flour is blended into batter. Turn mixer on low speed and mix for an additional 2 minutes. The batter may be a bit lumpy, but that is fine. If using a boxed mix, the mixing process is the same. Liquids and eggs on the bottom, add the mix and blend according to box instructions. I often use pineapple juice in place of some of the water.
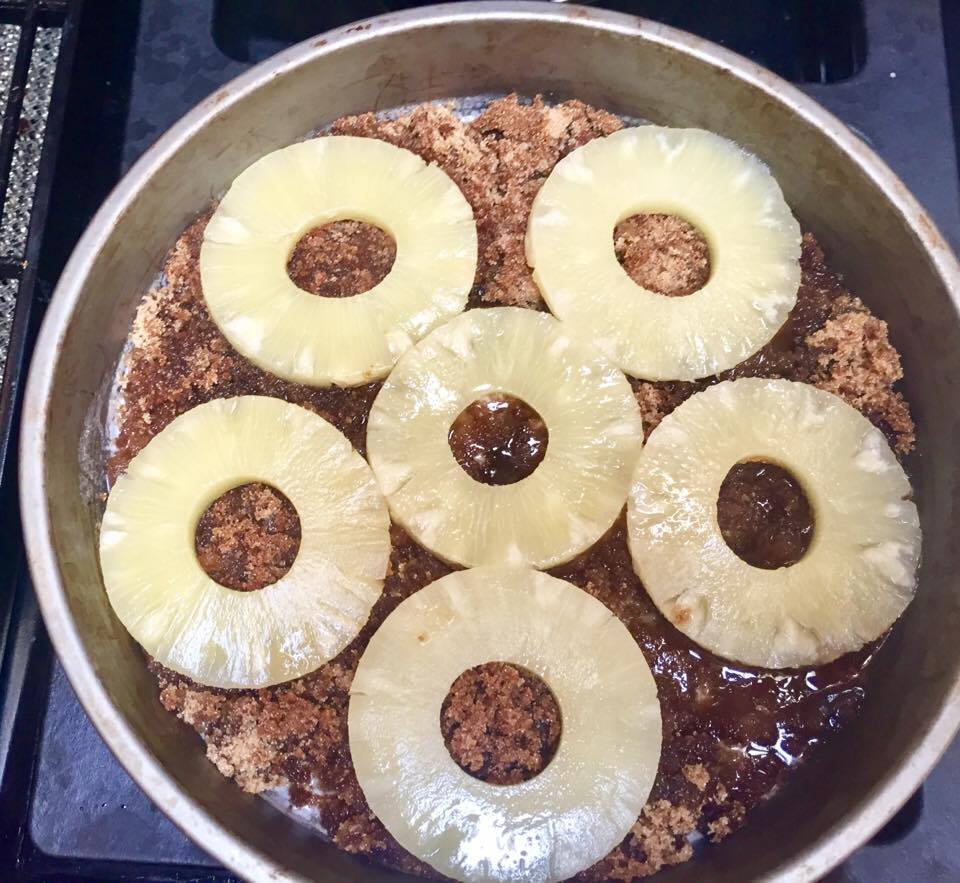
Now you are ready to assemble the cake! Place 8-inch cake pan over low heat on stovetop. Do not use a Tephlon coated pan, as this may melt Tephlon surface if placed on a burner. Warming the cake pan also will help with the initial baking process by melting sugars into butter. After butter is just melted, turn off heat and sprinkle brown sugar evenly over surface of cake pan, as shown above. No need to press it down into the butter or smooth it out perfectly.
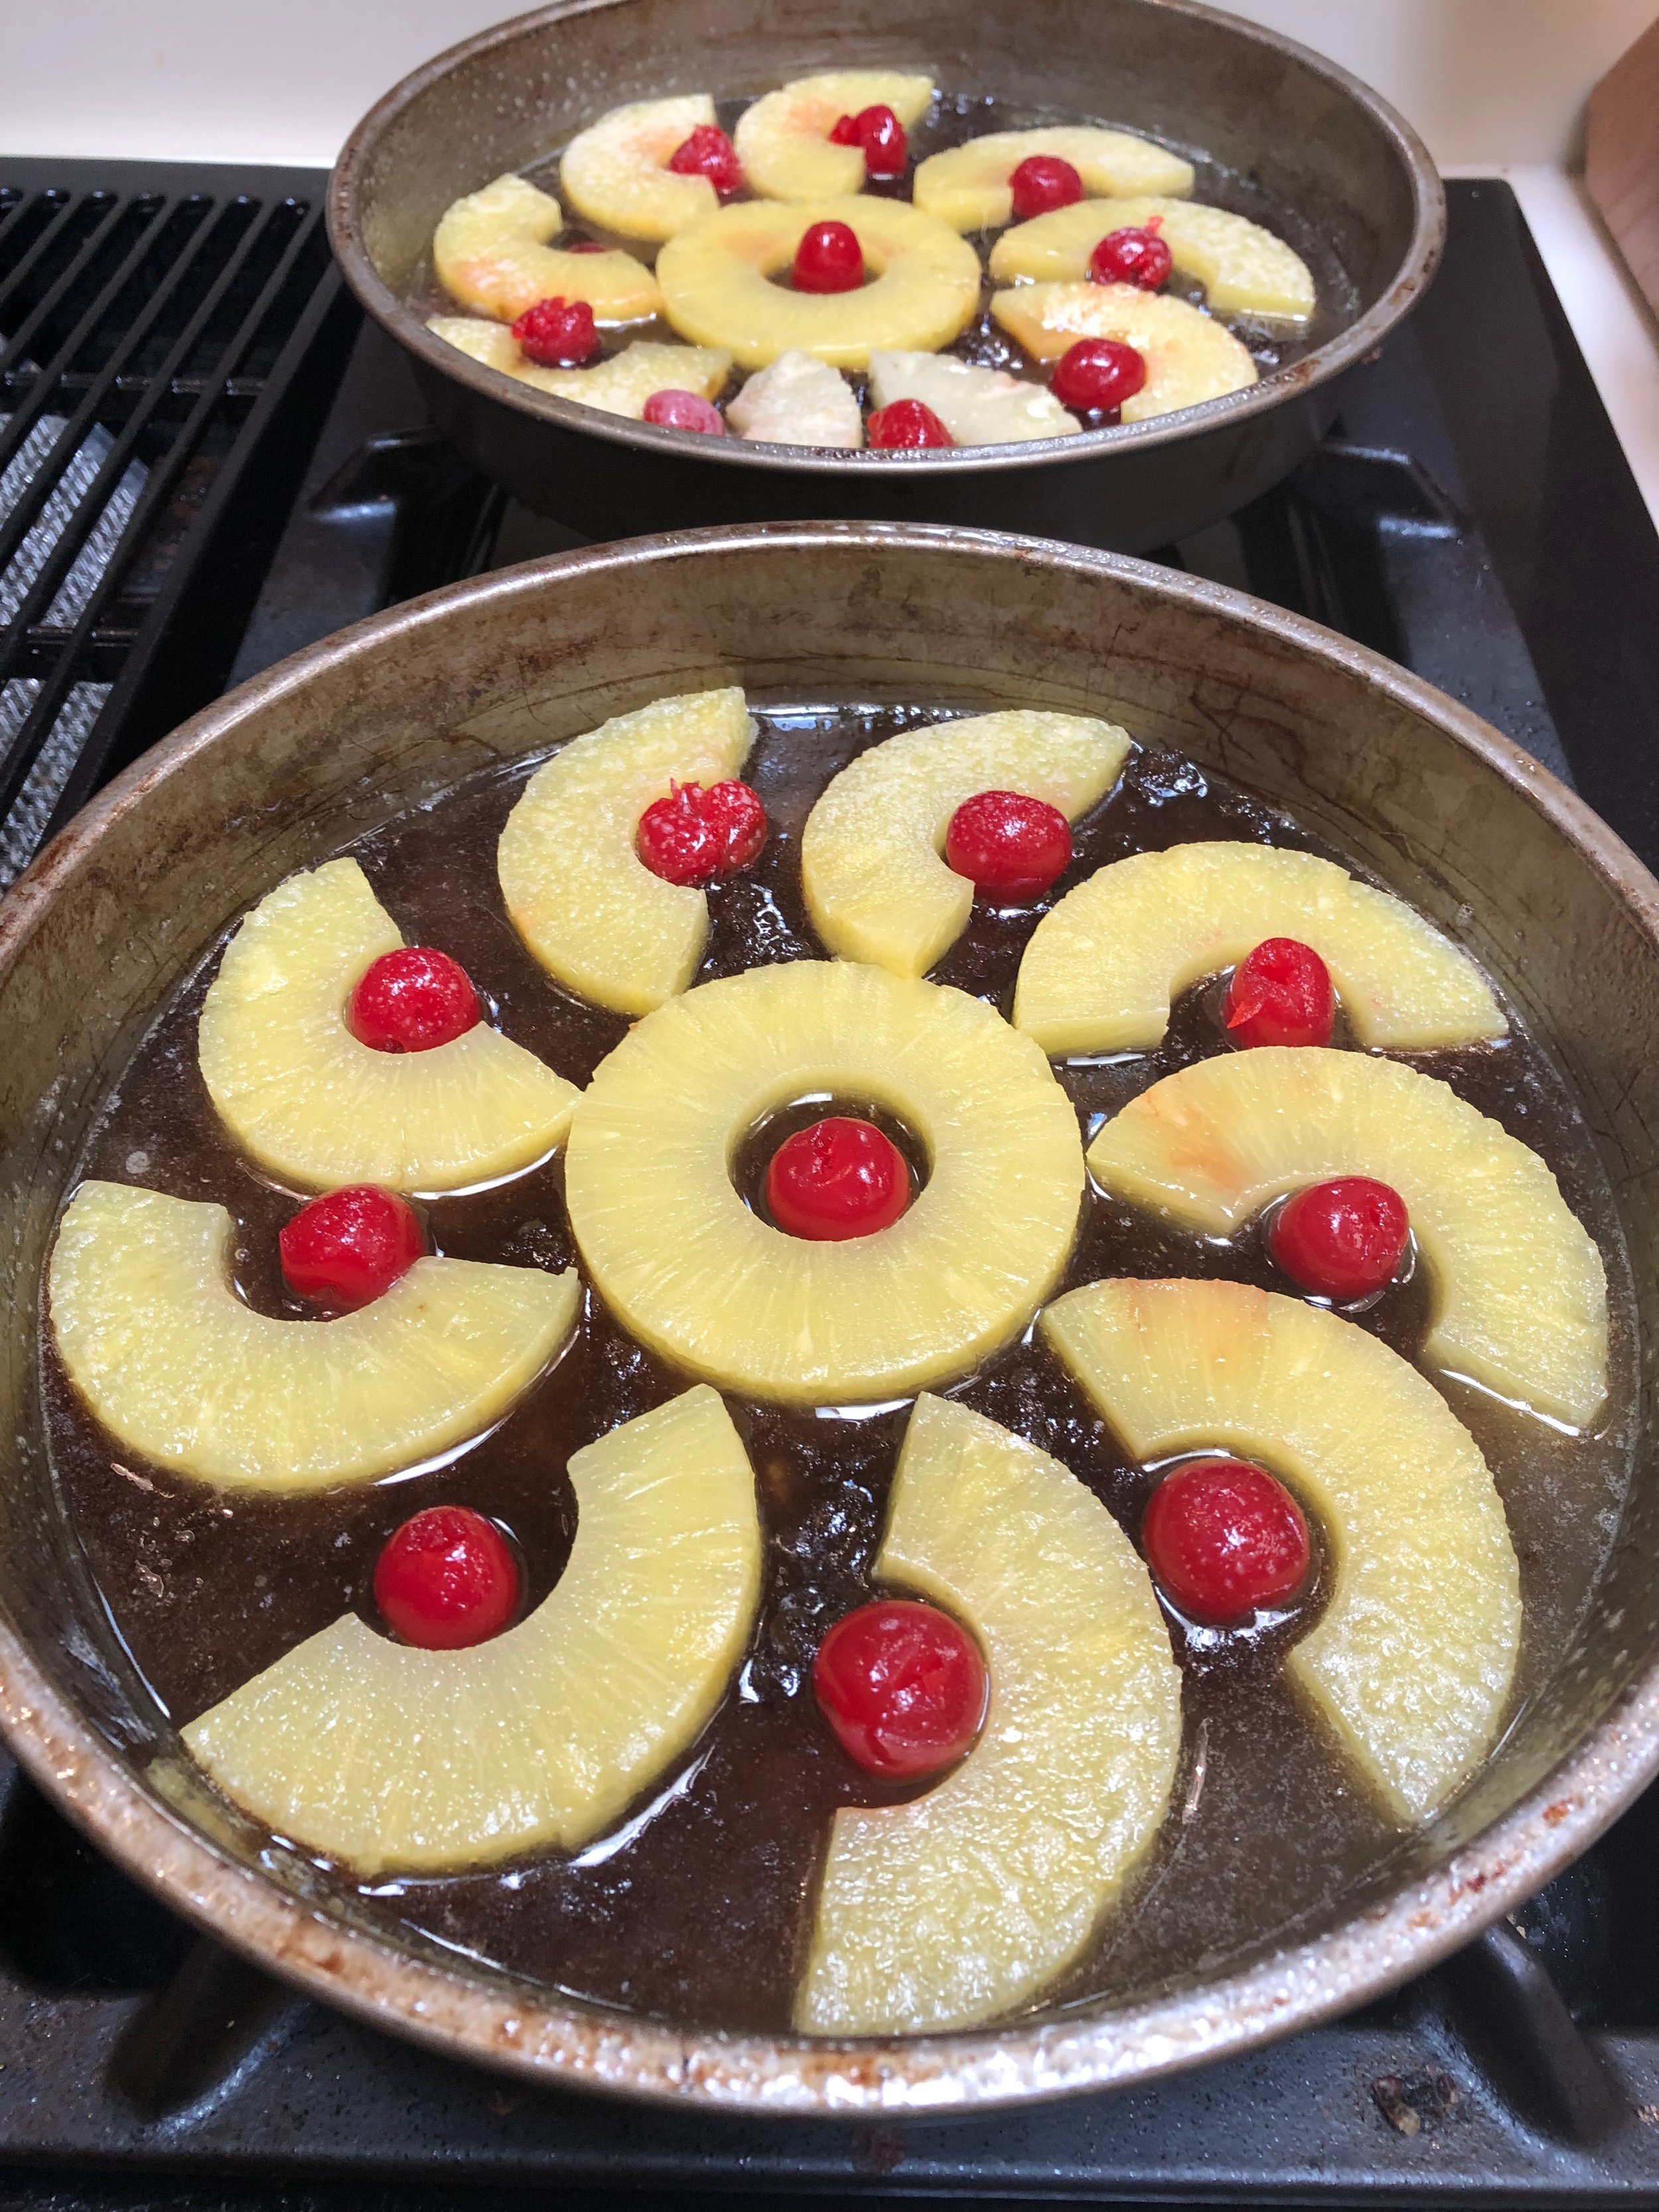
To arrange the pineapple slices, spiral them around the edges of one in the middle. Gives every slice a neat pineapple slice. This part of the recipe is super easy and fun to create! Arrange the pineapple slices however you like. Evenly around the outside of the pan with one in the center. Place a maraschino cherry in the center of each pineapple slice. Arrange the pecan halves around the center ring to create a star and then in spaces on outside of pan, between rings. If you don’t like nuts, either don’t use them or pick them off your baked slice and give them to someone who does! The meal appeal of this cake is wonderful! Yellow, red, brown and ivory cake… beautiful!
Now its time to create the cake! After assembling all the fruits and nuts, pour the batter over the top to cover everything. Now place into a preheated 350 F oven, on the middle rack and bake for 35 – 40 minutes. The final cake will bubble around the edges as it bakes and the fat and sugar heat with the fruit juices below. The cake will be quite brown so make sure you bake it long enough that a toothpick or cake tester comes out clean when inserted in the center. I often use the press testing method of indenting the middle of the cake with your finger and if it bounces back the cake is finished baking… need experience so use a toothpick if you are not sure. If not baked long enough, you will have a mess when flipping time comes!
Flipping the cake over is the next and final step! You need to work fairly quickly while brown sugar is still hot. Cool cake will not come out of the pan efficiently. Run a knife quickly, yet carefully, around the edges of the cake to loosen cake and sugar, being careful not to tear the cake. Choose the plate you want to serve your cake on that is larger than the cake by at least 1 inch. Place cake on top of pan, centering cake. This next step is the tricky part as the cake is very hot. Using potholders, grab plate and pan underneath. Lift both and reverse wrists to flip cake pan to the top and plate on bottom… upside down. Don’t be afraid to tap on counter after flipping, as this helps to release cake from pan. Tap top of cake a few times with knife you used before to ensure you hear a hollow sound and cake has dropped. Lift pan carefully from plate to reveal your creation! If any fruit sticks, carefully remove with knife or fork and replace in its place on the cake.
Didn’t I tell you it was going to be beautiful? Smells heavenly too! Slice it warm and serve with a bit of whipped cream or ice cream if you like… Plain is amazing too! Enjoy!!


