Danish Layer Birthday Cake
Danish Layer Birthday Cake
- Dansk Lagkage Fødselsdagskage Cake (Lagkagebunde)

Need an elaborate birthday cake to celebrate a special day? This is it! Looks like you are a professional baker but so simple to make… tastes so fresh and yummy too!

Danish Layer Birthday Cake
- Dansk Lagkage Fødselsdagskage Cake (Lagkagebunde)
Yield: 1 cake with three thin cake layers
Ingredients:
- One yellow box cake mix
- ½ teaspoon almond extract
- 3 large eggs
- 1 stick butter, melted
- 1 cup water
Or for a scratch cake:
- 3/4 cup butter or 1 1/2 sticks, softened
- 1 cup granulated sugar
- 3 eggs, room temperature
- 1 1/3 cups all purpose flour
- 3 tablespoons milk
- 1 teaspoon baking powder
- butter or cooking spray
Cake Assembly Ingredients:
- 3/4 cup of strawberry or raspberry jam
- 1 box instant vanilla pudding or custard
- 1 ¾ cup milk
- 2 bananas, thinly sliced
- 2 cups whipping cream, cold
- ¼ cup powdered sugar
- ½ - 1 teaspoon cornstarch or tapioca
- ¼ teaspoon almond extract
- Fresh fruit such as: blueberries, strawberries, mandarin oranges, raspberries, etc.
Equipment Needed:
- Three 9 inch round cake pans
- Waxed paper, scissors
- Cooling racks
- Liquid measuring cup
- Small microwave-safe bowl
- Stand up mixer or hand mixer
- Measuring spoons
- Dry measuring cups
- Medium mixing bowl
- Rubber spatula
- Paring knife
- Wire whisk
- Flat edged spatula or frosting knife

It’s my birthday and I’m making myself this amazing cake! This birthday cake is a recipe sent to me by my chiropractor, who is of Danish descent. We are always sharing recipes and this one is of all things… a birthday cake! You can make a cake from scratch or use a box to save time. (I was told the boxed mix turns out exactly the same as the scratch recipe too… so why not use it?) The final cake looks fabulous… like a professional made it and tastes sinfully good too! I’m going to simplify the steps… So here we go….let’s bake!


Preheat oven to 425 degrees F
Start by prepping the pans. Take three 9 inch cake pans, either spray cooking spray or butter and flour the pans. Make sure to grease it well with butter or cooking spray so the cake won't stick to the pan when it's baked. I also trace a circle of the bottom of the pan onto waxed or parchment paper and cut the circle out. Place the parchment paper circle onto the greased bottom of pan and set the pan aside. I line the pan for all my baked goods to ensure they come out of the pan whole!


Meanwhile, cut up butter into chunks, place in a microwave-safe bowl and microwave for about 25 – 30 seconds, or until just melted. Allow to cool for 3-5 minutes.


To prepare the cake, start by placing the liquids in the bottom of the bowl first. Place the eggs, extract and melted butter in together and blend on low speed for 1 minute until smooth. Add water and continue mixing for another minute. Now place the cake mix on top and continue mixing on low speed until dry ingredients are no longer visible. Using a rubber spatula, scrape down sides of bowl and increase mixer speed to medium. Beat for 2 minutes. Batter will look thick and rich, as shown above.


Time to pan the batter. Using a ½ cup dry measuring cup, scoop batter equally into the three pans until all batter is used. Use a rubber spatula to scrape the sides of the bowl so every bit of batter makes it into the pan. Spread batter evenly to smooth and cover pans evenly. Place pans on center rack of preheated 425 F oven, leaving about one inch space between oven sides and pans for airflow. Bake for 8 to 10 minutes or until light golden brown. Be careful not to over-bake the cake. It’s done when the cake feels firm to the touch or by inserting a toothpick into the middle and it comes out clean, rather than coated with batter. The cake will continue to bake after removing from the oven as it cools.


Remove cakes from oven and Let them cool in the cake pans for 10 minutes. Then once cooled, run a small butter knife around the pan edges to loosen the sides from the pan. Place the wire rack over the top of the pan, invert it, and tap it lightly to remove the cake. Carefully peel off the waxed or parchment paper from cakes and Allow the cake cool for several hours. (For best flavor make the entire cake the night before and refrigerate)


While cakes are cooling, prepare pudding. Use a wire whisk to beat milk and pudding mix well until slightly thick. Refrigerate for at least 15 minutes to chill and thicken.


Prepare whipped topping while pudding is chilling. Make sure whipped cream is cold as this will increase volume of final product. Whip cream on high speed for about 1 minute or until soft peaks are formed. Add almond extract and powdered sugar and continue to whip for an additional minute or two or very thick. Don’t over mix though as this is how butter is made and you don’t want chunks in your whipped cream. A bit of cornstarch or tapioca can be added to help firm whipped cream for spreading on cake, especially if you plan on refrigerating it until the next day.
Cake Assembly:


We are ready to create your masterpiece! Slice the bananas thinly. Remove a cake layer on to a serving plate or cake platter. I sometime sprinkle each layer with a bit of Amaretto. On the bottom layer spread half of the jam and top with half the banana slices. Then gently spoon about ¾ cup of the pudding on top and spread to cover the bananas.
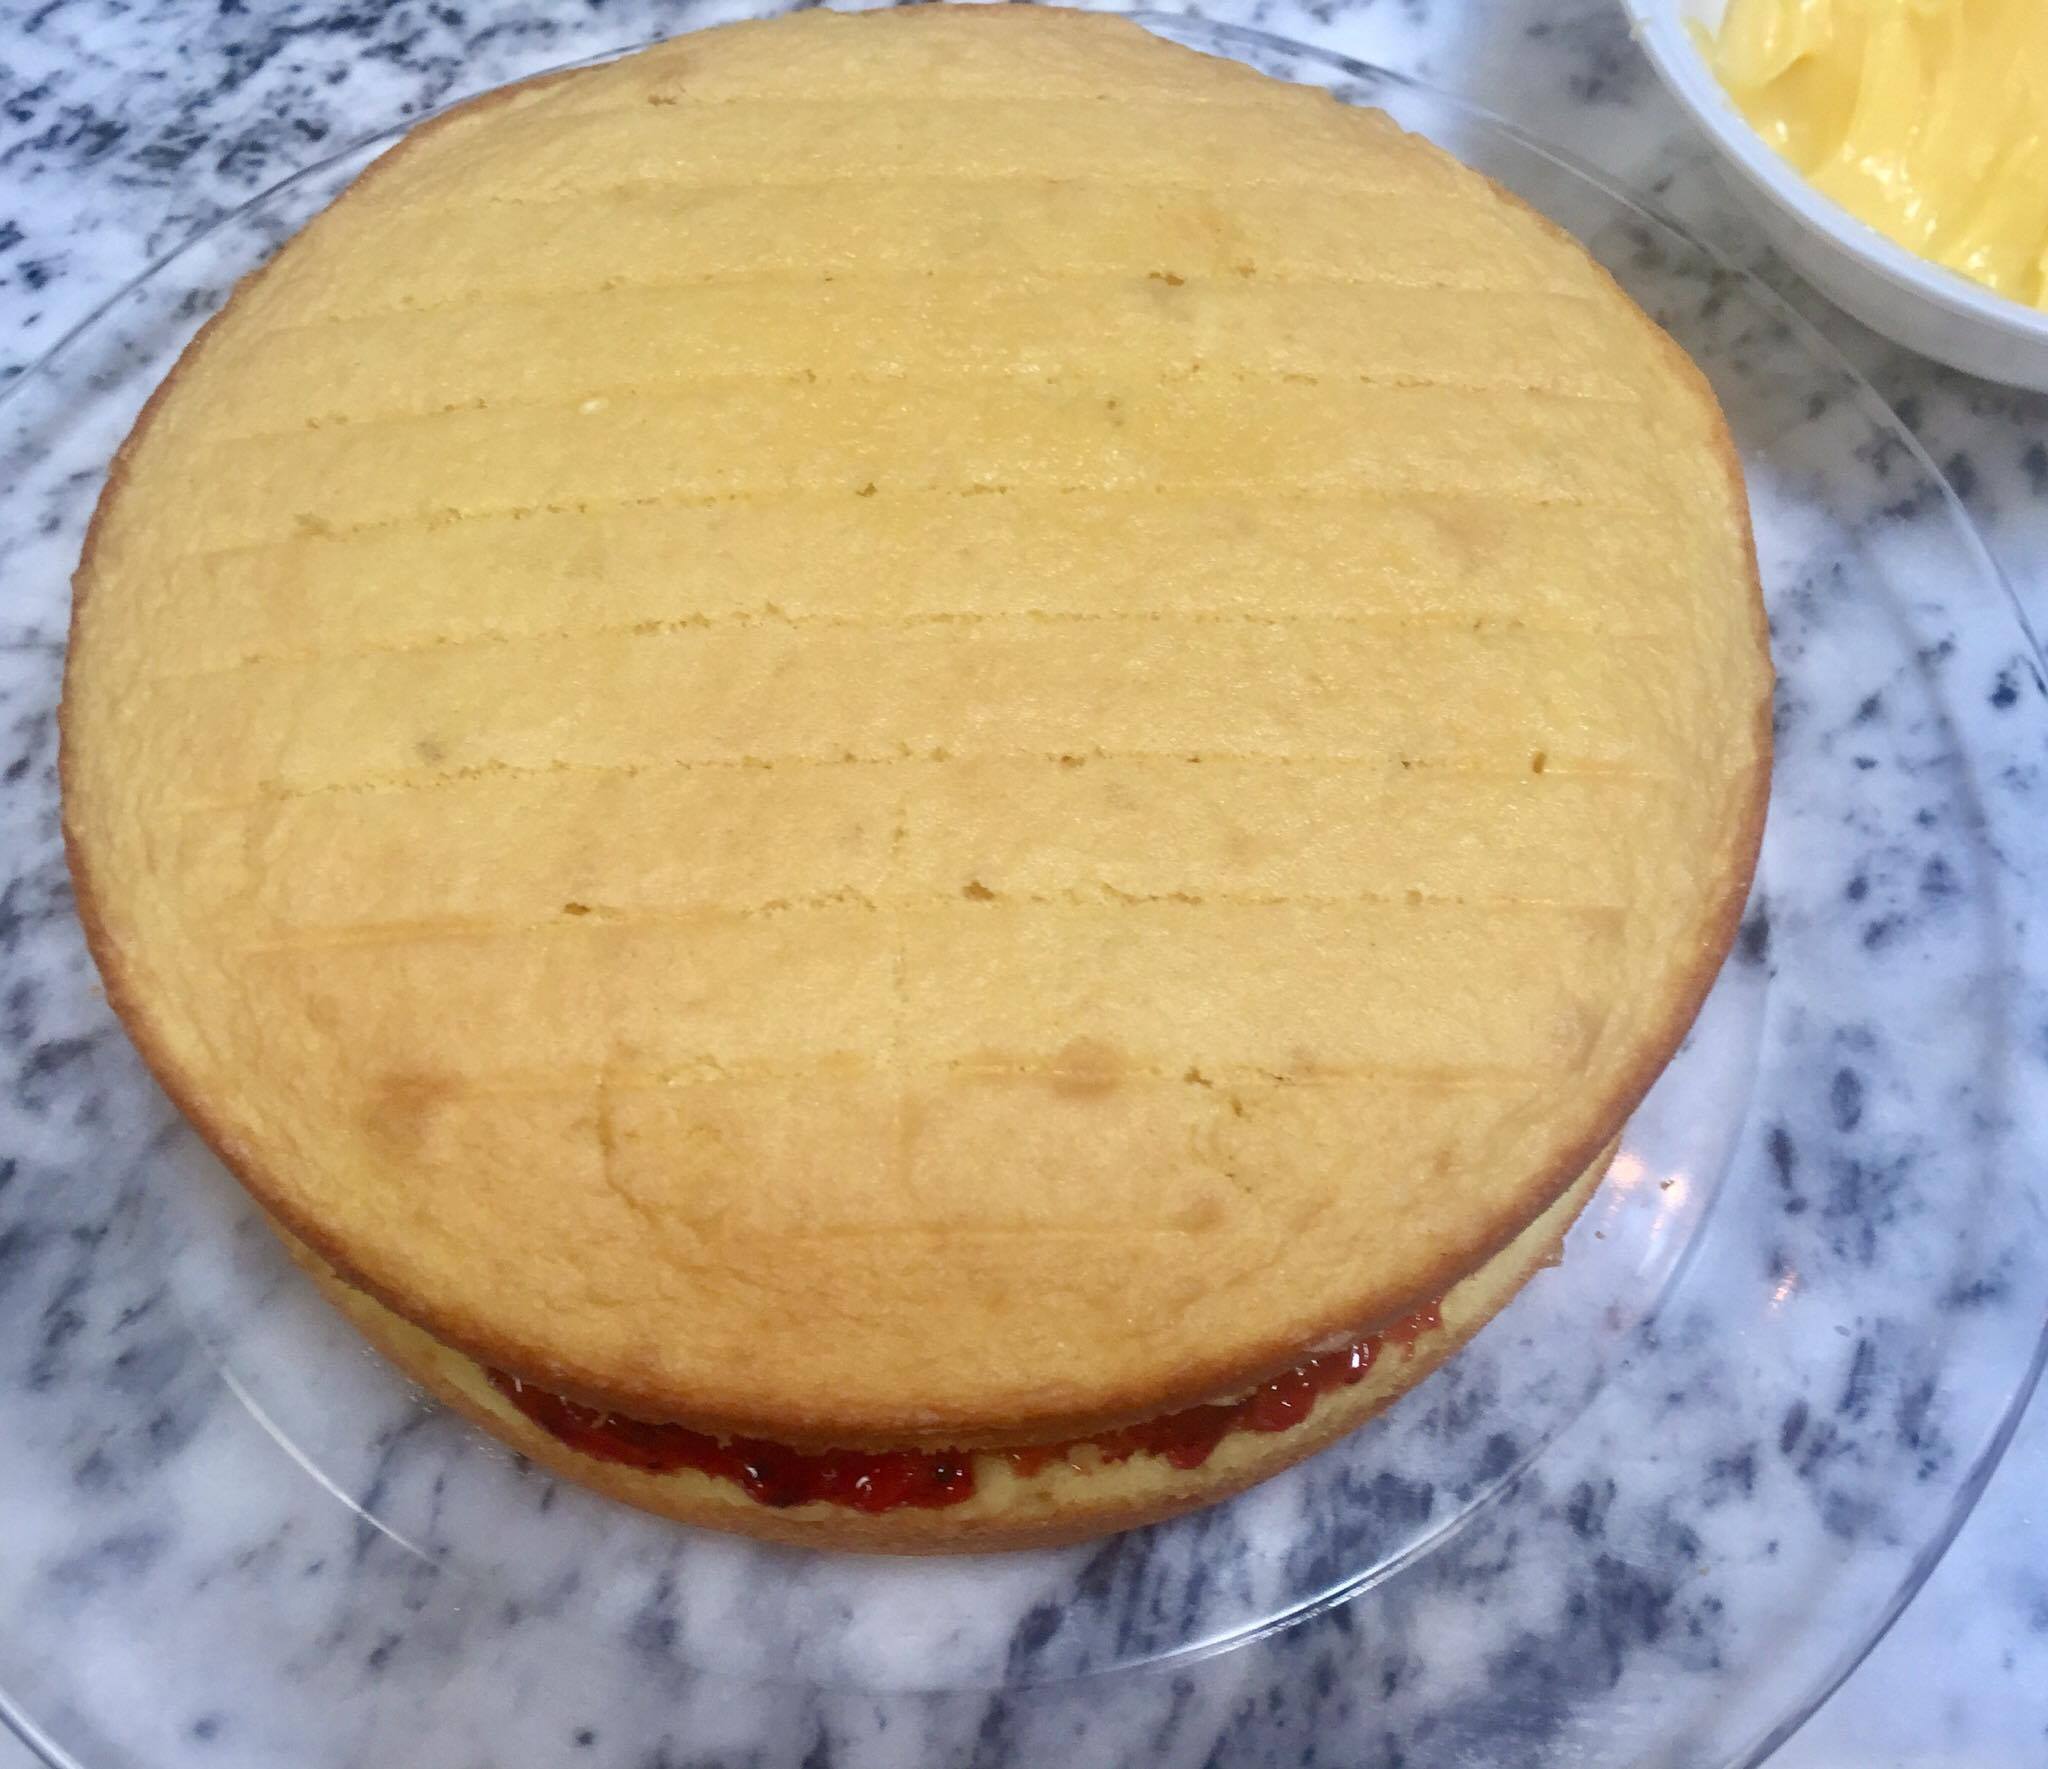

The first layer is done! Place the next layer of cake gently in top and press lightly. Repeat the previous step for layer two and then top with third cake layer… ready for whipped cream!


To begin the frosting process, apply large blobs of whipped cream on side of cake layers and spread to coat well. Place about a cup or so of whipped cream on top and spread well to connect to sides. Use cream liberally.


Time to decorate! This cake is so colorful with the fruit you choose. Any fruit will work… depending what’s in season. If using canned fruit, place fruit on paper toweling to ensure it’s dry and prevents too much liquid on cream. Decorate with fruit on top and all around the edging of the cake, as shown. Refrigerate, uncovered until serving.
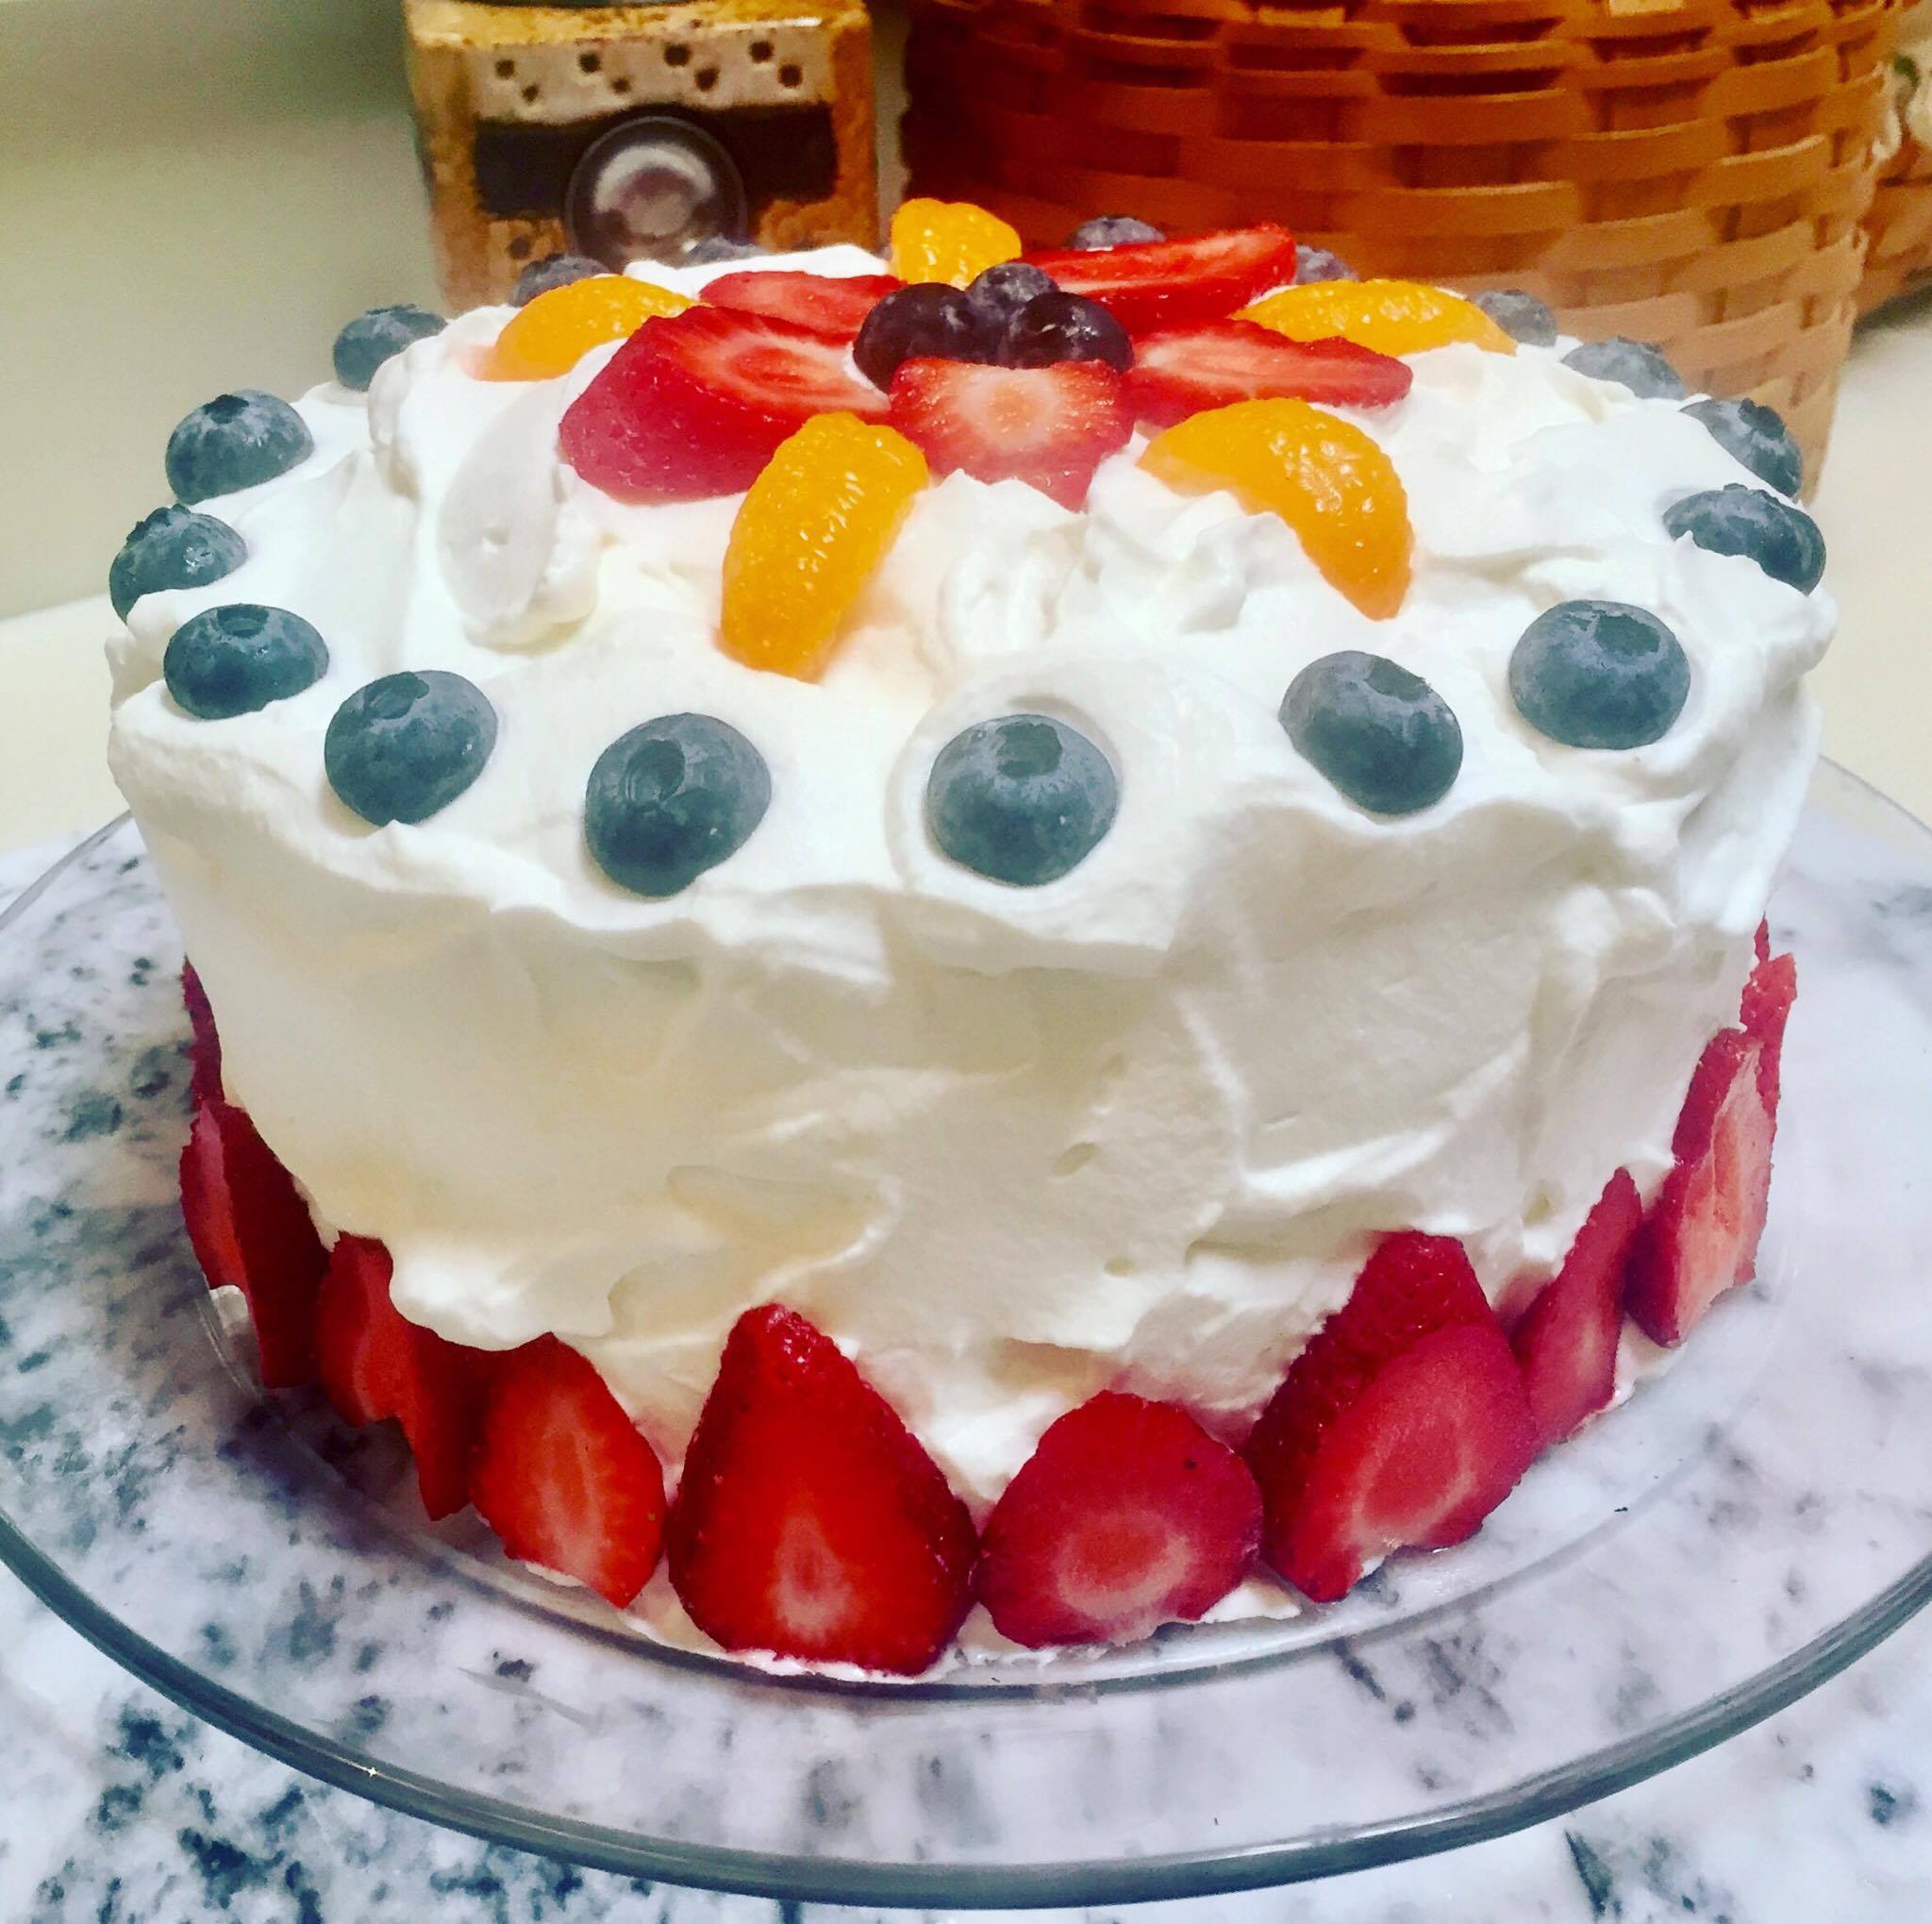

Doesn't it look fabulous? It tastes just as good as it looks, if not better! Enjoy!
Need to print the recipe? Click Here