Stove Top Chicken Pot-Pie and Homemade Biscuits
Stove Top Chicken Pot Pie
and Homemade Biscuits
Yield: 4 – 5 servings
For years I have made chicken pot pie on cold winter evenings. I usually baked the dish with a pie crust or puff paste on top. To save time, I decided to see if I could prepare it on the stove top and bake a few biscuits. So I pulled out the Dutch oven and went to work… the results were fabulous! Great way to use up leftover chicken too!
Ingredients:
Chicken; 6 boneless skinless thighs or 4 leg quarters or 4-5 boneless skinless chicken breasts (depending on personal preference)
Or… 3 - 4 cups leftover chicken, removed from the bone
3 – 4 tablespoons olive oil
3 large russet potatoes, ½” cubes
1 medium onion, diced
2 cloves garlic, minced
2 carrots, diced
1 cup corn, frozen
1 ½ cups chicken stock (keep anther cup available, just in case)
1 ½ teaspoons kosher salt
½ teaspoon black pepper
1 1/2 teaspoon dried thyme
3 tablespoons butter, cubed
1/3 cup flour
2/3 cup low fat milk
1 cup frozen peas
Equipment needed:
Dutch oven (or heavy 5 quart pot)
Measuring cups, dry and liquid
Measuring spoons
Chef knife
Cutting board
Rubber spatula or wooden spoon
Tongs
Small bowl
Fork
Ladle or serving spoon


Chicken Prep:
If using fresh chicken thighs or breasts, place a Dutch oven or heavy pot over medium high heat for ~ 4 minutes. Oil should shimmer when heated. Place chicken of choice in Dutch oven and pan fry until golden brown about 5 - 7 minutes per side using tongs to lift and turn chicken. If meat is still sticking to surface of pot, continue to brown ~ 1 minute more. Be careful of splattering oil & slightly reduce heat. Meat will be cooked throughly. Remove chicken and place on a plate while cooking vegetables.


I am a firm believer in using time well while cooking. This means efficiency and a meal prepared quicker. While your chicken is cooking, prep your vegetables and assemble ingredients for the next step. If you have children old enough to help, this is an excellent way to get them involved by gathering supplies, washing vegetables or measuring foods. Peeling and chopping is also great if they are old enough and supervised. I feels that if kids help make it, they are more apt to eat it… without complaints.


This recipe is so simple from here! Reduce heat under Dutch oven slightly. Add all vegetables, to oil and juices from the chicken along with seasonings. I using leftover chicken, just add all the veggies and seasonings to the Dutch oven. Then pour chicken broth into pot and stir to blend well. Bring liquid to a boil and reduce to a simmer. Cook vegetables for about 12 - 15 minutes or fork tender.


After vegetable mixture have simmered for 15 minutes, give it a few stirs to distribute heat. Arrange chicken on top of vegetables and push them slightly into liquid. Cover the Dutch oven and turn heat very low so barely a simmer is seen. I have a back simmer burner on my stove that I love for times like this. If the liquid boils too furiously, the liquid will evaporate before its ready. Sometimes cracking the lid of the pot slightly will slow the cooking process by lowering the internal temperature of the pot. I have also moved the pot halfway off the burner to reduce the heat, making sure the pot doesn't fall off of course. Electric stoves can be tricky when trying to maintain a low heat too. I prefer gas when cooking, as I feel you have better control with the heat and outcome of the food you are cooking. Electric burners don't turn off when you cut the power, so careful monitoring is important not to accidentally burn the food. When teaching students to cook in foods class, half of our stoves were electric. I found this a great opportunity to teach students the benefits and disadvantages of each mode of cooking! The Dutch oven full of lusciousness will simmer for ~ 10 minutes or hold until biscuits are ready.


While chicken pot pie is simmering, you can prep your gravy thickener. Generally as a rule you shouldn't add flour or thickeners to a hot liquid as you will wind up with a lumpy mess. Thickeners should be added to a cold liquid or combined with fat to coat the starch graduals and allow them to stay separated. Same rule applies when you create a roux…Flour is added to melted fat and then cold liquid is added to thicken it up. In this recipe, to simplify the process, the butter is cubed and then placed in the Dutch oven to melt. Create a slurry whisking the milk and flour together until smooth.


If using whole chicken pieces, remove the chicken from pot so you can prepare the creamy gravy. When lifting the lid be aware of the steam that will escape and open it AWAY from you! You will find the fragrance escaping the pot amazing!
Time to make the gravy! Add the milk slurry to the pot and stir well. I love using a rubber spatula as I can scrape sides and bottom to prevent sticking. Continue to stir slowly, using a figure eight motion, until gravy has thickened, about 3 - 4 minutes. It is a fairly quick process if your pot pie mixture is bubbling. You don't want the bottom to burn… Add the peas last so they stay bright green. This dish is so colorful with the orange, yellow and bright green veggies! I fusing whole chicken, return the chicken pieces to the pot.

Your Stove Top Chicken Pot Pie is ready!! Spoon over an opened biscuit … make a side salad, and dinner is served! Below is a quick recipe to make your own biscuits, cut or drop style… ENJOY!!

Fluffy Homemade Biscuits
Yield: 9 – 10 biscuits
Nothing better than homemade biscuits! They are incredibly easy and flakey. Canned biscuits work in a pinch, but when you taste the difference between canned and homemade… You’ll never go back. Making drop biscuits saves time and turn out yummy too. I use this recipe for strawberry shortcake and biscuits and gravy too!
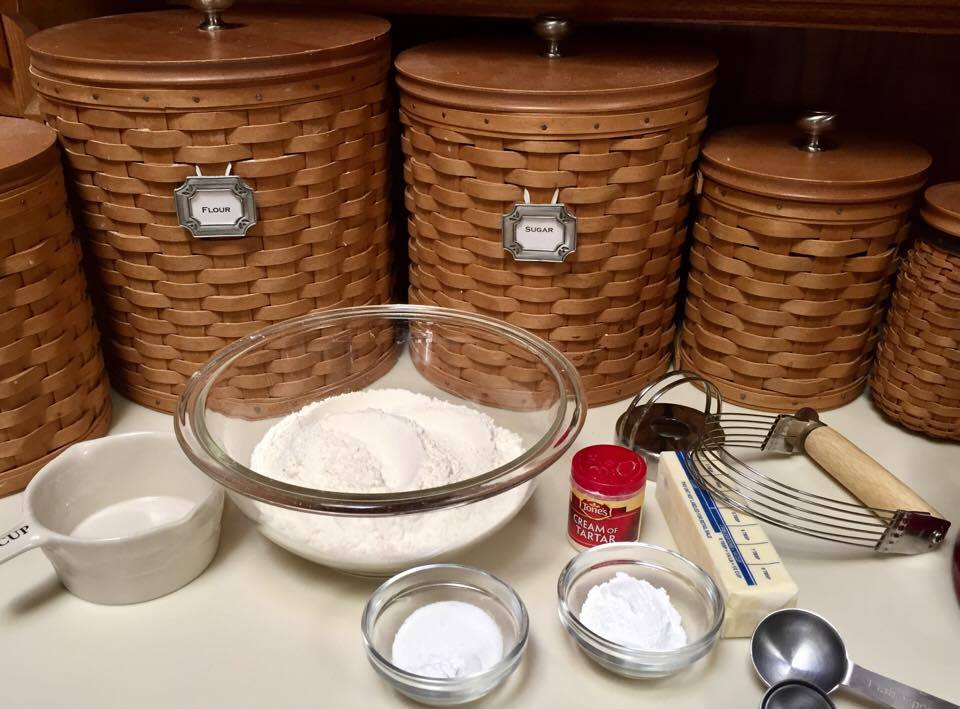
Ingredients:
2 cups all purpose flour
1 tablespoon baking powder
1 tablespoon granulated sugar
½ teaspoon cream of tartar
½ teaspoon kosher salt
½ cup cold unsalted butter (1 sick) or shortening
2/3 cup low fat milk (or 1 cup for drop biscuits)
Equipment Needed:
Medium bowl
Pastry blender
Rubber spatula
Measuring cups, dry and liquid
Measuring spoons
Biscuit cutter
Parchment paper
Half sheet baking pan


*Preheat oven to 425 F
Biscuits are basically prepared in five steps… then bake! First step is to combine all dry ingredients in a medium bowl and stir well with rubber spatula. Cube cold butter into 16 chunks by slicing 8 equal pieces vertically and then cutting horizontal in half. Place butter on top of dry ingredients.


The next step uses a pastry blender (two knives or your fingers work too) to cut the flour into the fat. Fat creates the soft, flaky crumb we love in biscuits and pie crust. I prefer using a pastry blender as it is round and fits the bowl shape making it easier to mix and combine fat and dry ingredients. As you mix the fat might stick in the wires. Periodically stop and push the fat off the wires with your fingers. As the fat slowly combines, it will stick less. When the mixture resembles fine crumbs or a cornmeal texture as shown above you're finished cutting in! Cold butter makes this process much easier as it doesn't become sticky as quickly. If using shortening, pack a dry ½ cup measuring cup with cold shortening and level off with a knife. This will be the same measurement as a stick of butter.


Now is time to add the liquid! Make a well or hole in the middle of the flour filled bowl with the rubber spatula and pour all the milk into the hole. Using the rubber spatula, mix the milk into the flour using delicate round strokes. Not over mixing the dough is very important to create fluffy biscuits. Mix the dough about 10-12 times. Dough will start to pull together and away from the sides of the bowl as shown above. Don't worry if it is still a bit floury and not a perfect moist mixture! For drop biscuits, increase the milk and blend until a looser, wet dough is formed.
Prep your pan by lining it with parchment paper. The paper will help to reduce the burning of your baked good while you wait for a lovely golden appearance. (Trick… Place a small amount of fat under the corners of the paper to help prevent the paper from rolling up.) Set pan aside.


Ready to knead! Dust a space of clean counter or a pastry board if you have one. My daughter, Hannah, bought me a marble pastry slab for Christmas this year and I LOVE it! Keeps my dough cold while working it and is so pretty too! Dump your bowl of dough out onto the floured surface and gently create a ball. It might be a bit sticky, but flour your hands a bit and you'll be fine… baking is not a clean job! Gently fold dough in half and press down lightly with your hands. Turn dough, sprinkle a bit more flour and press and fold again. Only knead until dough starts to form a ball. It will be lumpy and irregular… again = fluffy biscuits. Don't be obsessed with smoothness or you will have hockey pucks for a final product!
*** Making drop biscuits? No need to knead the dough, just scoop out onto the pan using a spoon or dipper.


After kneading is complete, form dough ball into a 6 – 7 inch disk. Using hands, gently flatten disk into a circle about ¾ inch thick and 10 inches in diameter. Thickness is more important than diameter as you want the final product to rise and double during baking.
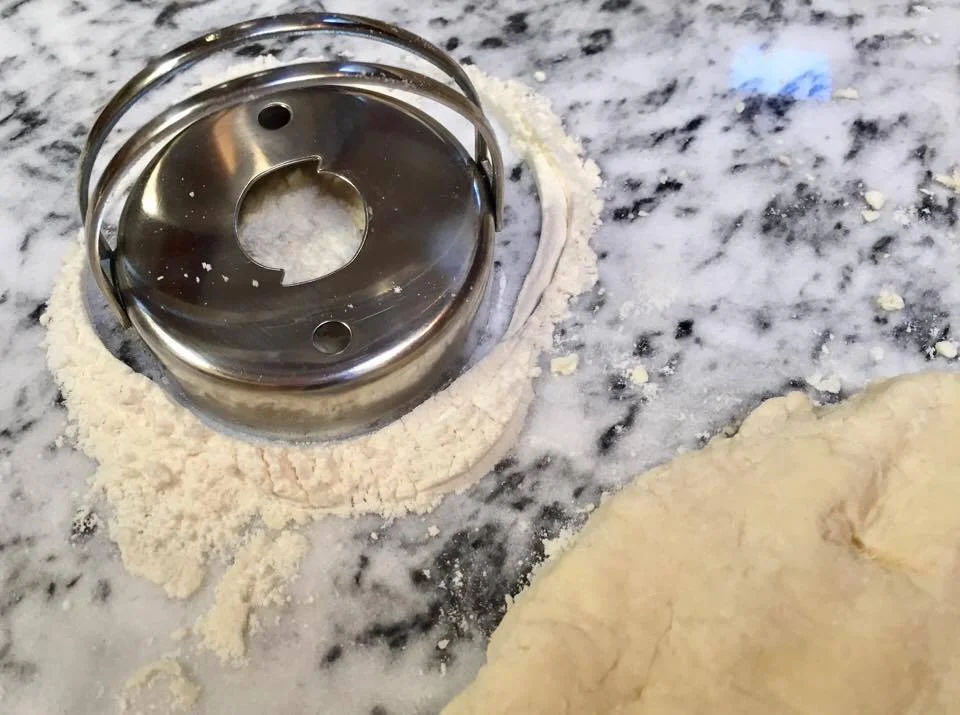


Now it's time to make your biscuits! Using a biscuit cutter (or a 2 1/2 -3” diameter glass works too), dip edge in flour and press into dough close to the edge. Try to make as many biscuits as possible by cutting very close to last one working your way around the circle and in the middle. The less extra you have, the better!
After you have cut as many biscuits out as you can, mold remaining scrap dough into a lose ball and press into another disk to cut out another biscuit. I use the scrap from that if there is any to make one more biscuit with my hands. Might not look pretty, but will be my test sample and reward for baking… or a grandchild’s! This should give you about 9 biscuits depending on size and thickness.


Ready to pan you biscuits! When teaching the biscuit process in Foods 2, I always showed Alton Brown’s DVD where he makes biscuits along side his grandmother! A precious episode and provides great advice to making biscuits two ways… worth a look see. I have made biscuits this way for 18 years now too, except I use parchment paper to protect the bottoms!
After biscuits are cut, place them shoulder to shoulder in the middle of the pan to help the biscuits rise up instead of out. After panning, take two fingers and gently press them down in the center of each biscuit, as shown. This will prevent biscuits from having a rounded surface and help with even rising. If you are using the final product for dessert, sprinkle tops with granulated sugar.
** Making drop biscuits… Place on pan leaving room to spread. Less uniform, but still better than canned biscuits !!


Bake biscuits for 12 -15 minutes or until golden. Remove from paper and cool on cooling rack for 5 -10 minutes. For serving, pull biscuit apart with thumbs or pry apart using a fork. Resist the urge to cut them, as this will destroy the flakey, layered… melt in your mouth texture! I often eat with jelly too.. as a great alternative to toast!