Best Banana Bread EVER!
Best Banana Bread Ever!
Nothing better on a chilly day than baking banana bread! Makes the house smell wonderful too! What else do you do with those over ripe bananas? I make banana bread often. Banana bread is one of my most favorite things in this world to bake! I freeze bananas all the time… they make the best bread ever! Even gluten free!
Best Banana Bread Ever!!
Yield: 1 loaf or 12 muffins
Ingredients:
¾ cup granulated sugar
1/3 c. butter, softened (~6 Tablespoons)
2 large eggs
1 ½ cups bananas (2 – 3 whole)
1/3 cup water
1 2/3 cups all purpose flour (or gluten free flour)
1 teaspoon baking soda
½ teaspoon salt
¼ teaspoon baking powder
** Optional, ½ - ¾ cups chopped nuts, walnuts or pecans work best
Equipment needed:
Medium bowl or stand up mixer
Liquid measuring cup
Dry measuring cups
Measuring spoons
Rubber spatula
Ice cream scoop for muffins

Baking, I find is one of the easiest to teach, as the rewards are so enjoyable... Instant gratification, wonderful smells and relatively easy preparation! Baking is a science and needs exact measurements and procedures. No steps are difficult, but of course your end product can vary depending on techniques used. When teaching the grain unit in foods classes, muffins were one of the first items prepared. The recipe is super easy … with great results! This recipe also helps to use up over ripe bananas and in my family, once a banana has a few black specks it is considered inedible. So what does one do with the random leftovers bananas? During cold winter days when I am looking for extra warmth, baking always comes to mind. So I either bake immediately or throw them in the banana bag in my freezer for later use. At some point I use them for either smoothies or my favorite breakfast treat… Banana bread. I often make extra breads in various sizes, freeze them… perfect item for Sunday brunch. Besides bread, I often make muffins, which can also be frozen for later, but muffins don’t hold up as long as bread does in the freezer. Add a few chocolate chips or nuts and they also become a healthier after school snack too. My daughter has to eliminate gluten in her diet, so have made this numerous times using gluten free flour too! I was given this recipe about 20 years ago from a colleague and have been making ever since…. ENJOY!!

Preheat oven to 350 F.
Before I bake I always prepare the pans first so when the batter or dough is ready I can get it into the oven quickly and not sacrifice action of the leavening agents. I find using the wrapper from the butter works well, unless you desire to spray the pan. Covering the bottom of any baked good with either waxed or parchment paper will ensure your item will come out of the pan whole. Before I did this step, I often left part of my bread in the bottom of the pan when flipping it out. Very disappointing!


Initially you will combine the butter and sugar and cream them together until well blended. They will be crumbly in nature, but the sugar should be attached to the fat. This will begin to incorporate air into your baked product. If mixing by hand, I use a rubber spatula so I can scrap and mix efficiently.

At this point you are ready to add the eggs. The recipe calls for large eggs, but I often buy extra large eggs as they are cheaper and give baked goods a better rise. Eggs also provide color, texture, moisture and air to baked goods. The protein in eggs also combines with the gluten in flour to create the framework of your bread. Combine eggs at medium speed of your mixer or hand beat until smooth and creamy yellow in color.
Now is when the bananas are added. Mash the bananas smooth first to allow them to disperse evenly into the batter. Combine the water and bananas with the egg mixture and blend well (~ 1 min. medium speed).


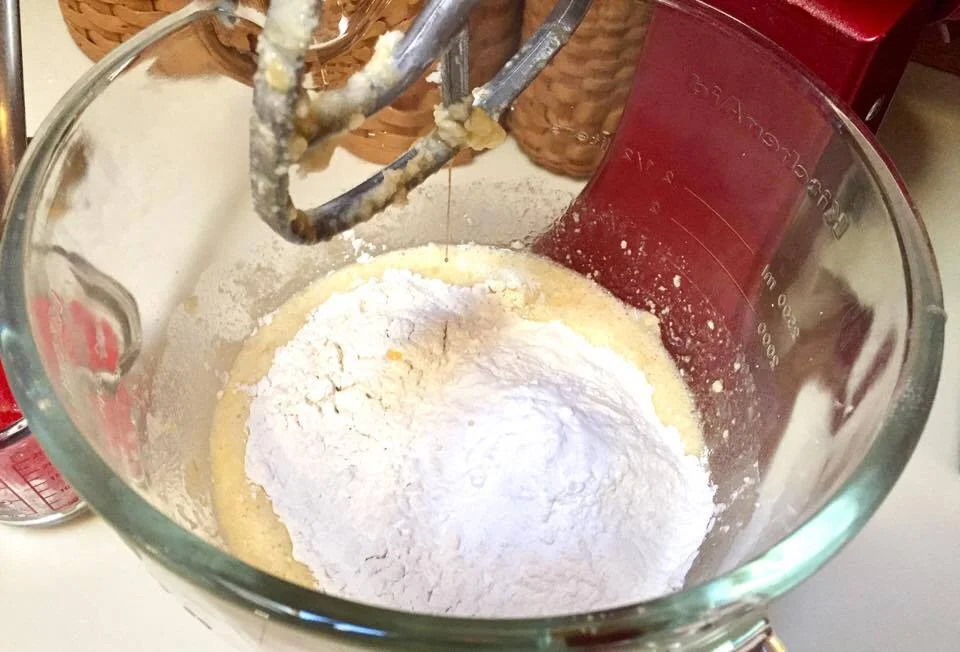

Now is where baking can be tricky. Combine your baking powder, baking soda and salt to the flour and stir lightly. It is most important that you do not mix up baking powder and baking soda, as they are NOT the same. They are both leavening agents and their function is to create gas and allow the bread to rise, thus food science. However, many an inedible science project has been created by incorrect measurement or mistaking baking soda for baking powder. Baking soda is an alkaline product and when misused causes a soapy tasting baked good, not feasible for human consumption. If you ever make the mistake once, like many of my students over the years, you will never make it again, trust me!
Add the flour mixture into the liquids and mix for about 20 - 30 seconds or until the batter is combined. The batter may look a bit lumpy, especially with the bananas in there, but resist the temptation to mix it to death or smooth. The final product will be dense and compact with holes or tunnels throughout.


If nuts are desired, add these at the end and hand combine with a rubber spatula about 10 strokes maximum. Again, being careful not to over mix.

Add batter to prepared 10 – 11 inch loaf pan (or 4 – 5 small 5 inch pans). Spread to level batter. I prefer to use metal pans as you can see from my well-used pan pictured. Ceramic or Pyrex pans can be used successfully, however baking times may vary, usually requiring less time.


Breads will bake for ~ 48 – 55 minutes for large loaf pans and 28 – 32 for smaller loaves. (If making muffins, divide batter between 12 - 15 greased muffin tins… bake for 15 - 18 minutes.) Loaves will be golden brown and darker than most people feel they should be. Remember, ovens vary in temperature, so if you are not sure if you oven runs hot or cool, check the breads a few minutes early to be sure they are not over baking. My oven runs a bit hot, so my breads were done at 48 minutes.
How do I tell when they are finished baking?
Coming from a baking family, baked goods are supposed to be brown and cooked, not doughy and under done. Brown is not burnt by any means! It is important that they are baked all the way to the middle. Testing for doneness can be done one of two ways; pressing lightly on the surface the bread should spring back not stay indented or by using a toothpick or cake tester that can go deep enough into the pan. When the tester is removed, batter should not be sticking to the surface of the tester. If loaves are still soft or gooey I would reset timer for 5 minutes and retest. Baked goods have carry over baking, which means they continue to bake after being removed from the oven. So if your tester has just a few crumbs attached or the bread springs back slightly I would remove for a moister final product. Remember, baking is a skill that is often learned over time by trial and error. If you make a mistake the first time, try again and adjust. It will still be delicious!!
After bread is removed from the oven, allow resting for 10 minutes. Loosen edges with a knife and turn over being careful not to crush rounded top. Peel off waxed or parchment paper and invert to flat surface. All to cool completely before wrapping or EAT it while it’s warm with a little butter. After all, you wouldn’t want to give away or serve an inferior product… correct? I wrap mine in foil rather than plastic to maintain crisper outer texture. Foil wrapped is ready to freeze too. Use a serrated knife to slice bread to avoid crushing or tearing slices.

** To make muffins: Grease 12 – 15 muffin rounds (I prefer not to use paper liners… Alton Brown taught me that muffins are not cupcakes, so paper liners are not needed) Using a 2 inch diameter ice cream scoop, scoop batter evenly into muffin tin about 2/3 full. Bake for ~ 15 – 18 minutes. Test as above for doneness adding 2 – 3 minutes, if extra time is needed, remembering not to over bake them. Allow resting for 5 - 8 minutes. Run butter knife around each muffin to remove from pan.